
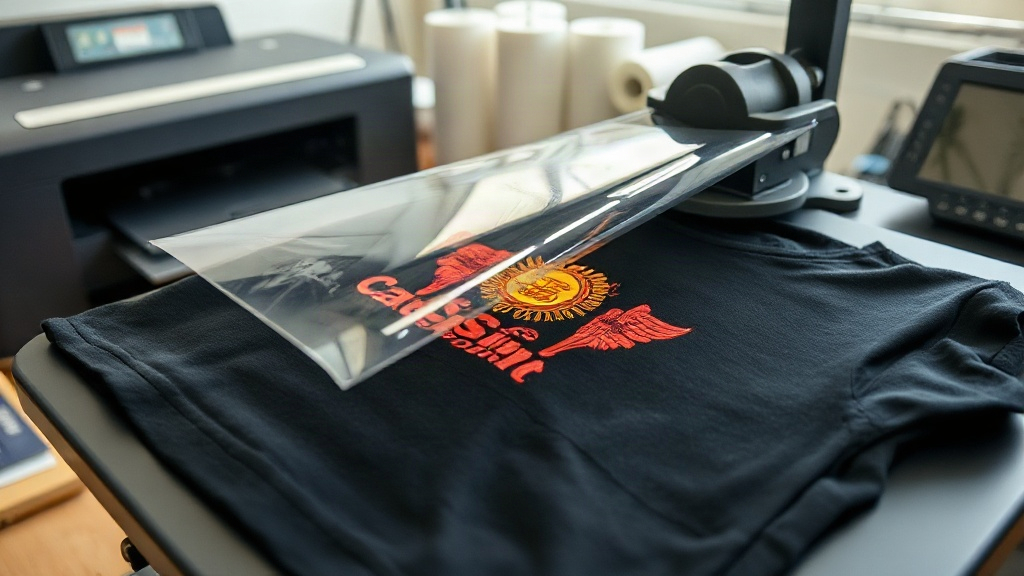
Custom apparel printing has evolved, and DTF transfers are quickly becoming a go-to method for creators and businesses alike. Unlike traditional screen printing or vinyl, DTF transfers offer vibrant colors, fine details, and the ability to print on almost any fabric. If you're new to this technology, you're in the right place. This guide will walk you through the entire process, from preparing your artwork to pressing the final product, and share practical tips to help you achieve professional results every time.
What Are DTF Transfers?
DTF transfers (Direct to Film) are a printing method where your design is printed onto a special film, coated with adhesive powder, and then heat-pressed onto fabric. The process begins with a digital printer that lays down white ink, followed by CMYK inks, onto a PET film. After printing, a hot-melt adhesive powder is applied to the wet ink, which is then cured. The resulting transfer can be stored and used later or pressed immediately onto garments.
One of the biggest advantages of DTF transfers is their versatility. They adhere well to cotton, polyester, blends, and even treated nylon, making them ideal for a wide range of apparel. Plus, they produce soft, stretchable prints that don't crack or peel easily when done correctly.
Why Choose DTF Transfers Over Other Methods?
If you're comparing printing options, here's why DTF transfers stand out:
- No color limits: Unlike screen printing, you can print full-color images with gradients and fine details without extra cost.
- No weeding: Forget the tedious process of cutting and weeding vinyl. DTF transfers come ready to press.
- Works on many fabrics: From 100% cotton to polyester and blends, DTF handles them all.
- Durability: When applied properly, DTF prints withstand dozens of washes without fading.
- Quick turnaround: Small batches and one-offs are cost-effective, perfect for custom orders.
Step-by-Step: How to Apply DTF Transfers
Getting a perfect press isn't complicated, but it does require attention to detail. Follow these steps for best results.
1. Prepare Your Workspace and Materials
You'll need a heat press, your DTF transfer, the garment, and a lint roller or cloth. Ensure your heat press is calibrated; temperature inconsistencies are a common cause of failure. A infrared thermometer can help verify the platen temperature.
2. Preheat the Garment
Pre-pressing the garment removes moisture and wrinkles. Set your press to 300-320°F (150-160°C) and press for 5-10 seconds. This step also helps the fabric shrink slightly before you apply the transfer, preventing uneven results.
3. Position the Transfer
Place the DTF transfer on the garment with the printed side facing up. If your transfer has a clear carrier film, the design should be readable. Use heat-resistant tape if needed to keep it in place.
4. Press the Transfer
Press at 300-320°F (150-160°C) with medium pressure for 10-15 seconds. The exact time can vary by film type and ink, so always check the manufacturer's recommendations. Too little time means poor adhesion; too much can cause the design to spread or scorch.
5. Peel the Film
DTF transfers are typically "cold peel" or "warm peel." Most modern films are cold peel: wait until the transfer cools completely (about 30-60 seconds) before peeling. Peeling too early can cause the design to lift or distort. Peel slowly and at a low angle for best results.
6. Post-Press for Durability
For extra durability, cover the design with parchment paper or a Teflon sheet and press again for 5-10 seconds. This step embeds the adhesive further into the fabric and smooths the print.
Common Mistakes and How to Avoid Them
Even experienced crafters run into issues. Here are the most frequent problems and their solutions:
- Peeling too soon: Always let the transfer cool completely before peeling. If you're using a warm-peel film, follow the instructions precisely.
- Insufficient pressure: If the transfer doesn't stick, increase pressure. Medium to firm pressure is usually needed.
- Wrong temperature: Too low and the adhesive won't activate; too high and the film may melt or the ink may crack. Use a thermometer to verify.
- Not pre-pressing: Skipping pre-press can lead to moisture trapped under the transfer, causing bubbles or poor adhesion.
- Stretching the garment: When pressing, avoid pulling the fabric. Let the press do the work.
Choosing the Right DTF Transfer for Your Project
Not all DTF transfers are created equal. Consider these factors when selecting transfers:
- Film type: Some films are designed for cotton, others for polyester. Match the film to your fabric for best results.
- Ink quality: High-quality inks produce brighter colors and better wash fastness.
- Adhesive powder: The powder's particle size affects the feel and durability. Fine powder gives a softer hand.
- Size and detail: DTF can handle intricate designs, but very small text may require a higher resolution printer.
If you're outsourcing your transfers, choose a reputable supplier who provides clear instructions and consistent quality.
Washing and Caring for DTF Printed Apparel
To keep your DTF prints looking new, follow these care tips:
- Wait at least 24 hours after pressing before washing.
- Turn the garment inside out before washing.
- Use cold water and a gentle cycle.
- Avoid bleach and fabric softeners, which can degrade the adhesive.
- Tumble dry on low or hang dry. High heat can cause cracking.
- Iron inside out, never directly on the print.
Frequently Asked Questions About DTF Transfers
Can I use DTF transfers on dark and light fabrics?
Yes, DTF transfers work on both dark and light fabrics. The white ink layer in the transfer ensures colors pop on dark backgrounds, while on light fabrics, the white base may be thinner to keep the design soft.
How long do DTF transfers last?
With proper application and care, DTF transfers can last 50+ washes. Durability depends on the quality of the transfer, the fabric, and washing conditions. Following the care instructions will maximize longevity.
Do I need a special printer for DTF transfers?
Yes, DTF printing requires a printer designed for DTF, typically using DTF inks and a film. You can also buy pre-printed transfers from suppliers if you don't want to invest in a printer.
Can I stretch DTF prints?
DTF prints have some stretchability, but they are not as elastic as the fabric itself. For highly stretchy fabrics like spandex, use a transfer designed for stretch or apply with less pressure to avoid cracking.
What's the difference between DTF and DTG?
DTG (Direct to Garment) prints directly onto the fabric, while DTF transfers are printed on film and then pressed. DTF often produces more vibrant colors on dark fabrics and works on more fabric types, while DTG is limited to cotton and requires pretreatment.